Thursday, May 26, 2011

Asparagus With Oranges


This is a dish that I found while scrambling for something easy to make on Easter Sunday. PF and spent Easter at my parents' house this year and I was tasked with bringing a few sides. As it happens it was just not in me to cook anything therefore I decided to run by Central Market after church and grab a few selections of their pre-made items. Well, also as it happens, Murphy's Law kicked in and Central Market was closed as well as HEB (should have seen that coming before we drove there).

Luckily the brand new neighborhood Randall's was open and we had one hour to shop and one hour to cook two sides. I ended up having my own personal Top Chef Quick Fire Challenge: Easter Edition in my kitchen. I scoured the internet for an asparagus dish and an au gratin potato dish that I could possibly whip up with the help of my trusty sous chef (also see patient and helpful husband) in about an hour.

I came upon this recipe for asparagus with oranges and thought I could pull it off. Cooked asparagus, orange vinaigrette, and sliced oranges-no problem. I didn't even realize the best part until we had gotten home with all of the ingredients. YOU COOK IT IN THE MICROWAVE! This was extremely flavorful, looked impressive, and most of all it was extremely easy. You can serve it hot, cold, or room temperature. PF and I love this dish and I hope you love it too!

Enjoy!

(recipe courtesy of epicurous.com)

Asparagus With Oranges

2 oranges, preferably navel
6 tbsp. extra-virgin olive oil
2 tbsp. fresh lemon juice
1⁄2 tsp. dried oregano
2 scallions, finely chopped
Kosher salt and freshly ground black pepper to taste
16 stalks large green asparagus (about 1 lb.)

 1. Zest 1 of the oranges; set zest aside. Slice off the ends of each orange. Working with one orange at a time, set an orange on end; with a small knife, slice off and discard the peel and the white pith. Holding the orange in your hand, use a knife to cut the orange segments away from their membranes (see Three Chef's Techniques.) Place segments in a bowl and set aside. Over a separate bowl, squeeze the remaining orange pulp to extract any remaining juice. Repeat with second orange. Whisk 4 tbsp. oil, lemon juice, oregano, and scallions into orange juice and season with salt and pepper; set dressing aside.

 2. Cut off about 1" from the tough end of the asparagus and transfer asparagus to a 9" x 13" microwavable baking dish. Sprinkle asparagus with reserved orange zest and drizzle with remaining oil and 1⁄4 cup water. Cover pan tightly with plastic wrap and microwave on high heat for 2 minutes. Rotate dish and microwave until asparagus is just tender, about 2 minutes more. Uncover and drain off cooking liquid. Toss asparagus with reserved citrus dressing and season with salt. Top with orange segments. Serve immediately or at room temperature.

Wednesday, May 25, 2011

Red Neck Eggs

PF and I at Snug Harbor on Frenchmen St. in NOLA
This past weekend PF and I headed down to New Orleans for a weekend of some RR with some great friends. If anything, the people watching alone made it amazing. I could fill you in on the major creeper we ran into on Friday night but I'll save that for another time. Other highlights of the weekend include a tour of the Old New Orleans Rum Distillery, an interesting adventure to a hotel pool that went awry (again, for another time), great live music and of course delicious food.

One of our favorite places that we went this weekend was called Elizabeth's. This place was a little hole in the wall next to the levy away from the French Quarter with some pretty edgy staff (cue waitress with bunny tats with revolvers as heads on her chest).  The water was a little peppery but the coffee was great and the food was even better. Next time you're in the Big Easy, I would strongly encourage you go there. You

PF ended up ordering a little gem called Red Neck Eggs. Fried green tomatoes topped with poached eggs and hollandaise sauce. Heaven on a plate. It was one of our favorite things we had all weekend and we couldnt't wait until the next time we make it back to NOLA to eat it again. So here I am charged with the mission of recreating this delectable concoction.

Step 1: Fried Green Tomatoes

Green Tomatoes aka Unripened Tomatoes

In searching for a fried green tomato recipe you'll find two things: a million different versions of the "best" recipe out there, and all kinds of reviews and write ups for the actual movie staring Kathy Bates. The recipe that I ended up with had cornmeal (I like the texture) and celery salt. I love the flavor of celery salt and never get to use it enough. It always makes me think of a good bloody mary. Since this has to do with tomatoes I felt it a match made in vegetable Heaven.

Another thing that had me confused was the actual picking of the tomatoes. They pretty much all looked good to me and felt nice and firm-good for frying and holding up to poached eggs and hollandaise.

(recipe adapted from The Flying Biscuit Cafe recipe)

Fried Green Tomatoes

3 cups flour
1/2 cup cornmeal
1 tablespoon salt
1/2 tablespoon black pepper
1/2 tablespoon cayenne pepper
1 tablespoon celerly salt
1 teaspoon onion powder
1/2 teaspoon garlic powder
3-4 green tomatoes
2 eggs
6 cups vegetable oil

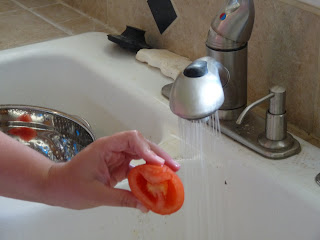
1. Wash and slice tomatoes in 1/4 inch thick slices

2. Mix breading mixture (1 1/2 cups flour, cornmeal, salt, black pepper, cayenne pepper, celery salt, onion powder, and garlic powder).

3. Set up your dredging stations. I usually use pie plates. Divide the plain flour (1 1/2 cups) in one pie dish, the 2 beaten eggs in another, and the breading mixture in the third. Like this:


1 1/2 cups plain flour, 2 beaten eggs, breading mixture

4. Heat the oil in a heavy duty skillet or a dutch oven. We used our fry daddy but if you don't have one make sure that its deep enough. The oil should be about 350 degrees. You can test it by dropping some flour in the oil and if it starts bubbling and floats to the top then it is ready.

5. Begin frying until golden brown, drain on a paper towel.


6. Once you're done, keep these warm in the oven while you make the eggs and hollandaise.

Step 2: Hollandaise Sauce

PF likes to call this Heaven sauce, probably because its practically all butter. The first time I tried to conquer it I whipped it by hand and to be blunt it sucked. I figured out how to make it in a blender and never looked back. This sauce is rich and really for special occasions as it has a cup of buter in it. You really only need a little to go a long way. We also like ours pretty lemony so I end up adding more at the end to thin it out. Enjoy!

Hollandaise Sauce

1 cup melted butter
2 large egg yolks
1 1/2 tablespoons fresh lemon juice
1 1/2 tablespoons water
1/2 teaspoon salt
black pepper to taste

1. Mix on high in a blender the egg yolks, lemon juice, and water until light and fluffy. Will be a light yellow color.

2. Melt butter in microwave safe container.

3. One butter has cooled slightly, stream in the butter while the blender blends the mixture on low. Once the butter is fully incorporated taste and add salt, pepper, and more lemon to taste.

Step 3: Poached Eggs

I happen to love poached eggs but they aren't everyone's cup of tea. This dish can be great with fried or scrambled eggs as well.

I usually do 2 eggs per person. You will need to bring a generous amount of water to simmer with 1 teaspoon of white vinegar. This is the KEY to keep the whites from going all over the place in the water. I like to crack the egg into a ladel like this:


so that I can easily slide it into the water. Cover the pot and let stand 3 minutes for runny yolks and 5 minutes for set yolks. Remove the eggs from the water with a slotted spoon onto a plate.

Now that you have completed all the steps put three tomatoes on a plate, put the two eggs over the top, and drizzle with the hollandaise sauce. I topped it with some green onion and served with orange asparagus (watch for the blog post). It was just as yummy as we remembered.

And there you have it, Red Neck Eggs!


Sunday, March 13, 2011

Dog Day Afternoon

Me and a great English Mastiff, Dutchess, enjoying ourselves at Boneyard

Today my husband and I decided to try out a new establishment to Htown that just officially opened this weekend, Boneyard Dogpark and Drinkery, located at 8150 Washington. Can I just say, what a freaking fabulous way to spend a Sunday afternoon! You can find them on Facebook and Twitter to learn more about their hours and what they have goin on.

Not only was it nice, for once, to be able to go and hang out for a wonderful day outside at a great bar but to be able to include the other addition to our family, Margot. Patrick (known from here on out on this blog as PF) and I shared a couple buckets of beer and enjoyed the day while Margot got to play around with other great dogs of this great city. The only thing I think was missing were some fun tunes. As one of the first weekends open, I'm sure there are still some things that are in the works. Other than that, it was such a perfect day.


Margot enjoying the spacious playground.

What makes this place different than another dog friendly bar you ask? EVERYTHING! First, the "backyard" of this place is completely fenced off. Fido can run around leash free and completely relax just as much as you are. Margot was just as free to roam around, socialize and chase her never ending addiction, the tennis ball, as we were to relax and socialize. Second, just like the dog park everyone there is friendly and open talk to whoever so even if you go alone, be ready to make some friends! In addition, you are surrounded by great dog owners who have socialized, fun, and friendly dogs who are fantastic to be around. Hanging out at Boneyard is like going over to a cool friend's house that has a huge backyard. It's so relaxing and fun.

Justin Bardwell and Devo at the Boneyard Drinkery, opening Feb. 19. Photo by Dusti Rhodes
Owner, Justin Bardwell, with his puggle Devo, on the bar at Boneyard. (photo by Dusti Rhodes via 29-25.com)

We were lucky to talk to the owner, Justin Bardwell, about what a great idea we thought Boneyard was. He agreed with us that there truly were not enough places in Houston where you could enjoy yourself while enjoying the company of your dog. It was great to see him out and mingling with the crowd. He is super excited to share his idea with the rest of us dog loving Houstonians.


PF and I were also very lucky to meet the owners of Barrio Dogs, a wonderful non-profit that focuses on education and awareness on proper animal care in low income communities. The owner, Jennifer Washam and her husband Chris were such wonderful laid back people who have a passion for caring about animals and sharing their knowledge with other people. One of Barro Dogs' focus' is animals that can offer therapy to those who need it. As many of us animal owners know, our pets can offer solice to us in times when no one else can. While it is not their main focus, rescuing animals has become a kind of an occupational hazard and they do have pets that can be adopted as well! If you're interested in more information you can also find them on Facebook and Twitter. Click on the Barrio Dogs link to visit their website!


Zilla Street Eats truck

Another benefit to Boneyard, the food truck! As an establishment, Boneyard cannot really sell food in order for it to be a dog friendly place. However, partnering with the many foodtrucks in the city has its benefits. Today, we were lucky enough to be graced by the presence of Zilla Street Eats. We had a lunch of pulled pork and mac, a dirty burger (burger with french fries and mac and cheese on top) and fried nutter butters. One word, DELICIOUS! PF especially loved the crunchy cheeto pieces on top of the pulled pork and mac. If you're interested in trying one of the many delicious delecacies they have to offer, you can find their current location on Facebook or Twitter.

Dirty Burger

Pulled Pork and Mac
Fried Nutter Butters
All in all it was such a great day to share together. I hope that you will try this place and let us know what you think!

Until next time!

Katie and PF

Follow us on twitter! @katielflynn and @patricksflynn


Thursday, July 1, 2010

Chocolate Dipped Coconut Macaroons


This past Father's Day we had plans to go to lunch with my parents but they were canceled due to the fact that my dad was feeling a little under the weather. So lucky for me, I had a little more time to figure out what to do for his gift. Growing up whenever we asked my dad what he wanted for his birthday, Christmas, Father's Day, he always said he wanted us to make him something. He preferred a homemade gift. Well, now as I am 24 years old I don't know that a macaroni necklace would receive the same enthusiasm, especially since he doesn't really wear jewelry. I do know that my dad happens to love coconut so as I was grocery shopping this week I got the inspiration to make him coconut macaroons for a belated Father's Day gift. 

I don't love coconut the way my dad or my husband does but a macaroon is one of my favorite types of cookies. In researching recipes I found that there really is not much to it. Coconut is truly the star of the show. They were very easy to make and turned out delicious! I brought some to a going away party last night and received rave reviews! 

(adapted from several recipes with my own touches as well)

Ingredients

For Macaroons:

2 (14 oz) bags of coconut
1 (14 oz) can of sweetened condensed milk
1/4 cup mascarpone cheese
2 tblsp. heavy cream
2 tsp. pure vanilla extract
2 egg whites from large eggs
1/4 tsp salt

For Chocolate Ganache:

1 cup semi sweet chocolate chips
1 cup heavy cream

Preheat oven to 350 degrees. 

Combine the coconut, sweetened condensed milk, mascarpone cheese, heavy cream, and vanilla extract. 

Beat the egg whites and salt together until it forms medium firm peaks. I did this on a kitchen aid mixer but it can also be done with a hand mixer. It will look like this when you turn the beater upside down. 


Fold the egg whites into the coconut mixture. 


Line two cookie sheets with parchment paper. Using an ice cream scoop, scoop out the mixture and place it on the cookie sheet. I had to use my hands a little too make sure they were right so don't be afraid to get a little messy. There doesn't need to be too much space between the pieces as it will not grow that much. About like this:


Bake them in the oven for approximately 27-30 minutes until they are golden brown on the tops. 


Let them cool thoroughly before dipping them in the chocolate. 

Once the macaroons have cooled it is time to make the ganache. Ganache is a chocolate sauce that is comprised of equal parts chocolate and cream. I used semi sweet chocolate in this recipe but feel free to use whatever chocolate you like. 

Ganache is best prepared over a double boiler. If you don't have one it is easy to make one at home by placing a bowl over a pot of water. It is very important that there is enough water to heat the bowl but not so much that it might touch the bottom of the bowl once it starts boiling. If that happens, your chocolate will most likely seize and instead of ganache you will end up with a lumpy mess. 


Put the chocolate and cream in the bowl and stir constantly until the chocolate is melted and combined with the cream to make a smooth glossy chocolate sauce. 


I decided to dip only half of each macaroon and drizzle the other half . I didn't want to completely overwhelm the cookie with chocolate. Let the cookies sit for 45 minutes to an hour or until the chocolate is set. 

Happy Belated Father's Day!


Enjoy! 
Katie

Thursday, June 24, 2010

No Soup for You!


I'd like to start off by recognizing that it has been a while since my last blog, approximately 20 days, and for that I can apologize. It is quite worthless to have a blog if you aren't using it but as my mom said, "Life happens." I have a long list of topics that I plan to share so I hope it will keep me busy for a while--so please keep reading.

Second, I'd like to recognize my "friend" in my previous post that pointed me in the direction of the delicious El Tiempo Fajitaria. Apparently as a friend he wants a real name rec. So this is a shout out to Will Sealy. Thank you for your great recommendation. Your San Antonio upbringing has given you a keen nose for taco greatness.

Okay so now for the goods. Doozo Dumplings & Noodles located in the Houston Center downtown is no secret to many of those who work downtown in Houston. Patrick discovered it during his first few months at his job almost three years ago and has been an avid dumpling lover ever since. The first time I ever met him downtown for lunch that is where we went and its the only place we ever go every time I visit him downtown.

The dumplings at this place are delicious but the food is only half the fun of your dumpling experience. As you near the front of the line you are greeted with the following sign:


It is also an unspoken understanding of all those who have been to Doozo that you MUST have your money ready and KNOW YOUR ORDER before you get there, no doddling. They recently started taking credit cards here but the rule is still the same, money must be ready in your hand. Actually, its not so unspoken as you may get in trouble by the owner, Julie Lu, who is there ready to take every dollar and order.  You literally feel like you are walking on the set of the Soup Nazi episode -- no laughing though, you can't lose focus. She is extremely efficient and has memorized every possible combination of prices on the menu. Anyone who visits Doozo will know this immediately because the millisecond that you finish ordering, she recites your total to you. You can imagine the utter irritation across her face when you try to nervously mumble the words..."Uhh we're together" or "Can I add a drink?"  You pay, try to get some sort of thank you out of your mouth and scurry out the door. A strange feel of relief brushing over you releasing a tiny nervousness that you were a little unsure you even had.

The dumpling charade is entirely worth it though. I usually get the pork dumplings with extra spicy sauce. They also offer a chicken and vegetable option but I've been too nervous to change my order. For around 7 dollars you can get 10 dumplings and a drink so if you are in the Houston Center I would recommend that you check it out.


Enjoy!

Katie

Wednesday, June 2, 2010

Tacos Amor!


Patrick and I happen to love El Tiempo. In my opinion, its the best Tex-Mex Mexican food in town. I would venture to say on Earth-but that's just me. We even had our rehearsal dinner there! The downside to El Tiempo? It's pretty pricey. I'm not sure we have ever gotten out of there for less than $40 for just the two of us and that is without margaritas. So for obvious reasons, we really can't go there as much as we would like. Nevertheless, we love it all the same.

A good friend of mine told me about the meat market owned by El Tiempo, El Tiempo Fajitaria. He told me that the word on the street is that it has DELICIOUS tacos on the cheap. This information I can confirm as fact. It was amazing, and surprisingly pretty cheap. What it WAS NOT was a replacement for El Tiempo. It may be owned by El Tiempo, and it does have the same delectable homemade toritillas, but the only thing I found it had in common with El Tiempo is that it is Mexican.


The El Tiempo Fajitaria is part small market, part Mexican butcher, and part taco stand. This little gem had everything you would want out of an "authentic" eatery. First of all, a few things on the menu that I had never heard of. For instance, you can get a buche or tripas taco. The guy behind the counter showed me the buche which appeared to be pig's ear. Tripas is usually the lining of farm animals' stomach. I'm adventurous, but no thank you. They also had some classics that I knew of like barbacoa, menudo, and carnitas. Second, we were the only gringos speaking English in the place, which is usually a flashing neon sign for me that it is going to be good.


I ordered one barbacoa and one carnitas on flour tortillas and Patrick ordered two carnitas tacos. For those of you who don't know what barbacoa is , aka barbecoa de cabeza, its slow roasted cow's head and carnitas is the pork version of this Mexican delight. The food was so good. Nothing about it was fancy or even surprising but plain and simple it was good. The barbacoa was so tender it melted in your mouth like butter. Likewise, the carnitas was very tender and had the best flavor. It was incredibly savory and perfect with their house made green salsa. The tacos were HUGE. I only completely finished one. Patrick ate both of his, he couldn't resist! 

All in all it was a great place that I strongly reccommend. We loved it anyway!

Until next time, Adios!

Katie

Monday, May 31, 2010

Greeko


Everywhere that we went in Greece the Greek salad was delicious and served sans lettuce which made it so much better. Also, depending on the region there are a few differences in some of the things that go in the salad. For instance in Crete they use fresh mint in the salad and dress it with fresh olive oil and what I believe was white balsamic vinegar. In Santorini they added capers and fresh dill and used lemon juice as their acid instead of the vinegar. All were delicious though.

While we were there I got inspired to create something when we got home that took something very common here in Texas, pico de gallo, and give it a twist. Through my very creative new husband, the name Greeko (Greek pico) was born!

Okay so here it goes. This actually makes A LOT so it is great for a party. It would also be a great relish for chicken or fish or you could toss it with some pasta and serve it as a pasta salad. I also think it would be pretty easy to half.

Ingredients
10 Roma Tomatoes
3 Cloves of Fresh Garlic
1 Green Bell Pepper
1 White Onion
1 Cucumber
1 Anaheim Pepper
2 1/2 tablespoons of Capers
2 teaspoons Fresh Dill
2 cups of Crumbled Feta Cheese (I used the blocks packed in water and crumbled myself)
Juice from 1/2 of a Lemon
Extra Virgin Olive Oil
White Balsamic Vinegar
Salt and White Pepper (if you don't have it you can use black pepper) to taste

First get the seeds out of your tomatoes so that they do not over juice your Greeko. Cut each tomato in half and and squeeze the seeds out of them. This will make them easier to dice.


They will look like this on the inside when you are done.


Next, dice the tomato, bell pepper, onion, cucumber, anaheim pepper, and mince the garlic. Add the capers. Mix them all in together in a mixing bowl. Then squeeze the juice of half of a lemon into the bowl. Drizzle with olive oil (I did it about 2 and half times back and forth across the bowl) and then with the white balsamic vinegar (one time over the bowl).

Add the feta cheese.

Mix well. Season with salt and white pepper to taste.

I found this pico to have released a lot of liquid from the vegetables so I strained it with a fine strainer.

Serve with pita chips.


We brought this to a pool party and it was received very well! I hope you enjoy it if you try it, we certainly did.

Happy Memorial Day!
Katie